Deep Learning with DonkeyCar
Virtual Machine
To work on this assignment, we needed to run a virtual machine that had an Ubuntu 18.04 64-bit image on it. Looking back, we could have used a dockerized container but this was beyond our level of understanding.
We ran the virtual machine on VMWare Workstation. In addition, we created a virtual environment to isolate all the dependencies. In fact, it's recommended to do so even if we had a virtual machine as other assignments needed different dependency versions and compatability.
DonkeyCar
The virtual machine had all the necessary software on it, including the DonkeyCar framework. If ever interested, you can find the framework here. The DonkeyCar framework allows us to train a machine learning model and deploy it both virtually and physically.
- Locally
- Remote
- Physical
To run the framework locally, we only had to navigate to the DonkeyCar directory for our Ubuntu environment. Before running the simulator, we had to modify the configuration file for our simulator.
DONKEY_GYM = True
DONKEY_SIM_PATH = "/home/ucsd/projects/DonkeySimLinux/donkey_sim.x86_64" ## path to your simulator
DONKEY_GYM_ENV_NAME = "donkey-warren-track-v0" # donkey-circuit-launch-track-v0, donkey-warren-track-v0, donkey-mountain-track-v0
GYM_CONF = { "body_style" : "car01", "body_rgb" : (255, 205, 0), "car_name" : "Pororo", "font_size" : 30}
GYM_CONF["racer_name"] = "Pororo"
GYM_CONF["country"] = "South Korea"
GYM_CONF["bio] = "Hi!"

SIM_ARTIFICIAL_LATENCY = 0
SIM_HOST = "127.0.0.1"

USE_JOYSTICK_AS_DEFAULT = True      # when starting the manage.py, when True, will not require a --js option to use the joystick
JOYSTICK_MAX_THROTTLE = 1.0         # this scalar is multiplied with the -1 to 1 throttle value to limit the maximum throttle. This can help if you drop the controller or just don't need the full speed available.
JOYSTICK_STEERING_SCALE = 0.8       # some people want a steering that is less sensitve. This scalar is multiplied with the steering -1 to 1. It can be negative to reverse dir.
AUTO_RECORD_ON_THROTTLE = True      # if true, we will record whenever throttle is not zero. if false, you must manually toggle recording with some other trigger. Usually circle button on joystick.
JOYSTICK_DEADZONE = 0.2             # when non zero, this is the smallest throttle before recording triggered.
#
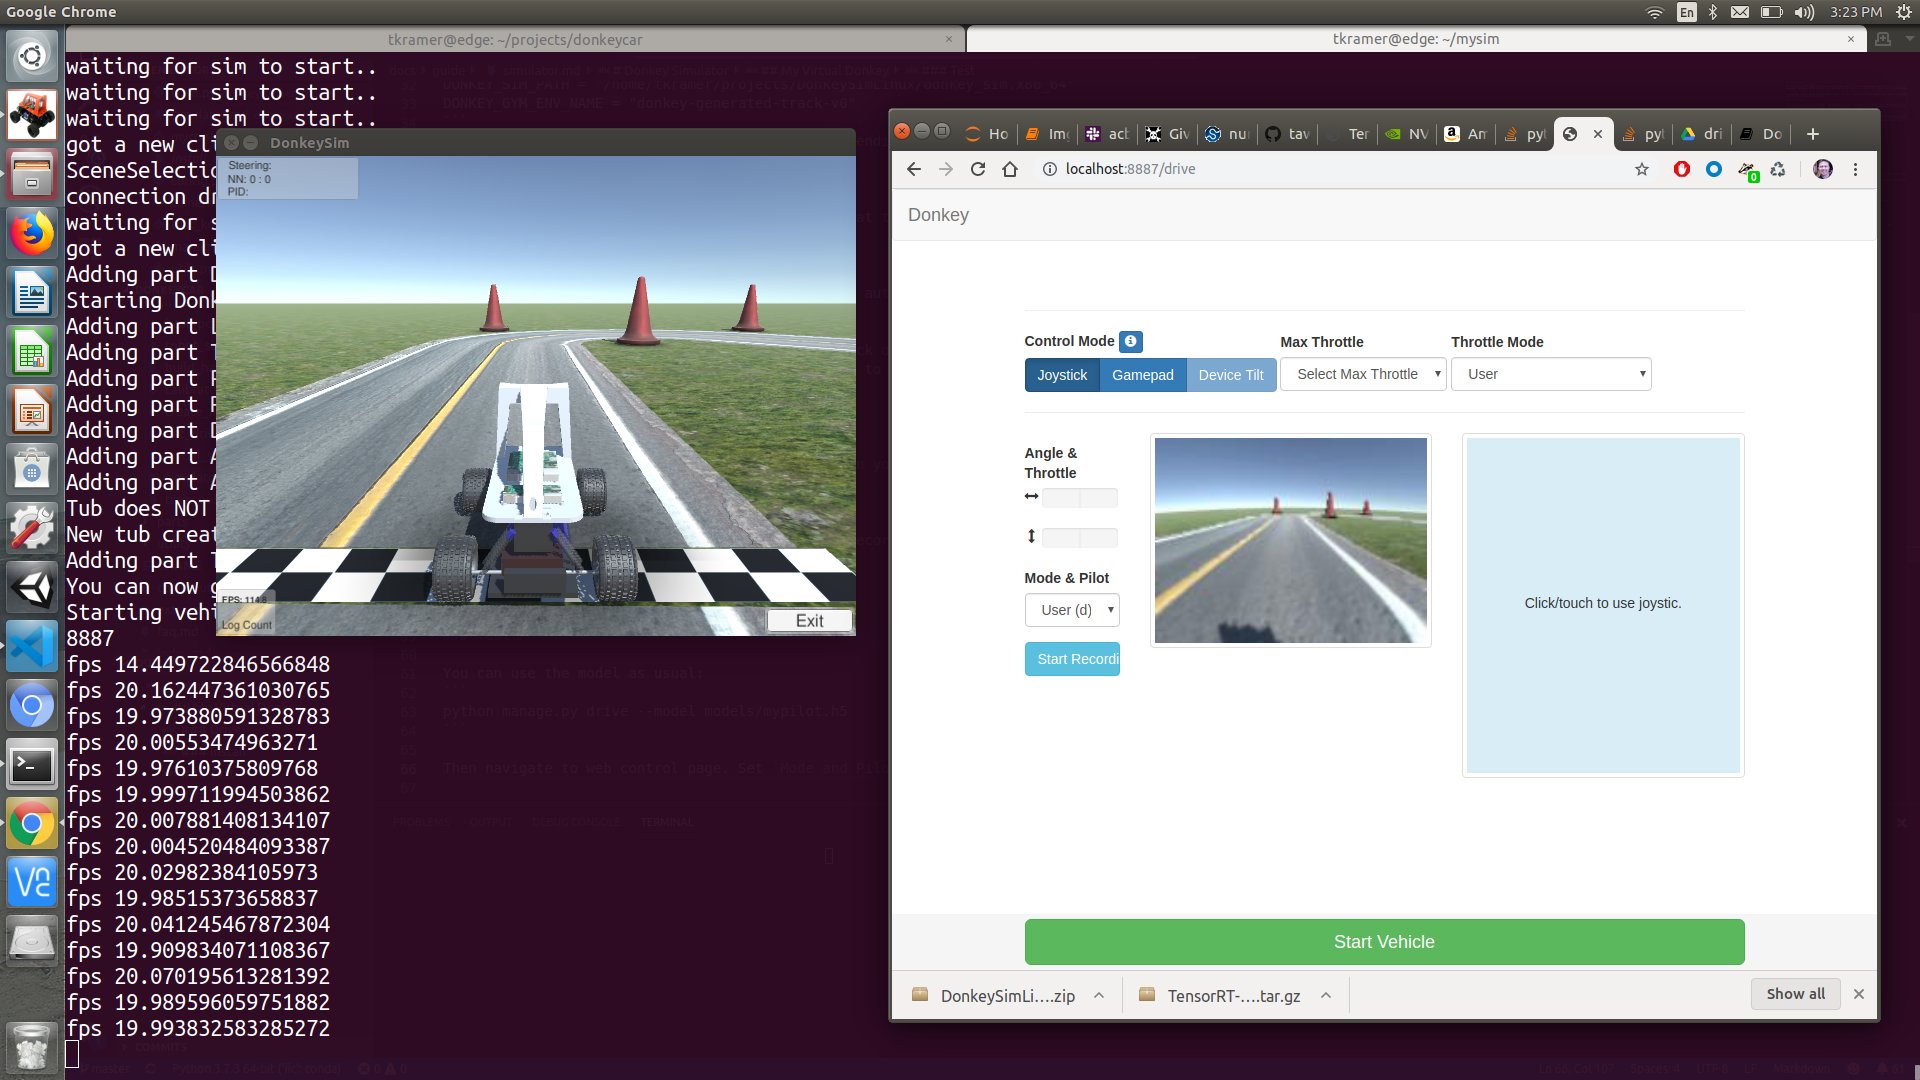
If everything was set correctly, we could now run this command in our terminal which would show our simulator running locally on port 8887.
python manage.py drive

The simulator allows for different controls, but as we configured our Logitech F710 controller, it was easy to collect data. The recommended number of laps was 20 to train our model. The simulator autocollects data in the root directory of our DonkeyCar framework in d4_sim/data
Once we had our data, all we had to do was run another command in the terminal to start training a model.
python train.py --model=models/model_name.h5 --type=linear --tubs=data/
To test our model, we ran:
python manage.py drive --model=models/model_name.h5 --type=linear
If everything worked, you would get this.
To run our framework remotely, meaning on another machine or domain other than our own computer, we only have to change one line in the configuration file.
SIM_ARTIFICIAL_LATENCY = 0
SIM_HOST = "donkey-sim.roboticist.dev"
The artifical latency is there to mimic real-world latency for testing on local, which is not needed in this situation since we'll have latency by default trying to connect to a remote domain.
The commands for running it are the same as local.
python manage.py drive # for manual
python manage.py drive --model=models/model_name.h5 --type=linear # for model
To view the car show up, navigate to https://www.twitch.tv/roboticists or https://www.twitch.tv/roboticists2.
If everything worked, you would get this.
To run it physically, all the steps are the same except that we need to replicate this on the Jetson Nano.
The following commands below ensure the installation of donkeycar and their dependencies on the Jetson Nano.
git clone https://github.com/autorope/donkeycar
cd donkeycar
git fetch --all --tags -f
git checkout 4.5.1
pip install -e .[nano]

sudo apt-get install python3-dev python3-numpy python-dev libsdl-dev libsdl1.2-dev libsdl-image1.2-dev libsdl-mixer1.2-dev libsdl-ttf2.0-dev libsdl1.2-dev libsmpeg-dev python-numpy subversion libportmidi-dev ffmpeg libswscale-dev libavformat-dev libavcodec-dev libfreetype6-dev libswscale-dev libjpeg-dev libfreetype6-dev
sudo apt-get install rsync

pip install numpy --upgrade
pip3 install -e .[nano]
To create a car, we would run one simple bash command within our donkeycar folder.
donkey createcar --path ~/<name>
The latest version of DonkeyCar (5.x) does not support the Jetson Nano yet, so the DonkeyCar version must be 4.5.1.

The configuration file generally stays the same except we're now adding in configurations for our VESC.
CONTROLLER_TYPE='F710'

CAMERA_TYPE = "OAKD"
CAMERA_INDEX = 0

DRIVE_TRAIN_TYPE = "VESC"
VESC_MAX_SPEED_PERCENT =.2 ## Max speed as a percent of actual max speed
VESC_SERIAL_PORT= "/dev/ttyACM0" ## check this val with ls /dev/tty*
VESC_HAS_SENSOR= True
VESC_START_HEARTBEAT= True
VESC_BAUDRATE= 115200
VESC_TIMEOUT= 0.05
VESC_STEERING_SCALE = .5
VESC_STEERING_OFFSET = .5
DONKEY_GYM = False
In addition, we had to replace several donkeycar files with our classes internal custom files to ensure compatibility. After all is set and done, we should be able to drive our car.